链接:https://pan.baidu.com/s/1McQS9FZk9AjmW2kZ1wgJRg
提取码:et1j
分类:elasticsearch
elasticsearch搜索
Vue——前端生成二维码
与后端生成二维码相比,前端生成二维码更具有灵活性,下面就介绍两种前端生成二维码的方式,两种方式相比之下,vue-qr比qrcode多了一个再中间添加logo的功能。
方式一:qrcode
- npm
npm install --save qrcodejs2 |
- import
import QRCode from 'qrcodejs2' |
- 使用
<div class="qrcode" ref="qrCodeUrl"></div> <script>methods: {creatQrCode() {var qrcode = new QRCode(this.$refs.qrCodeUrl, {text: 'xxxx', // 需要转换为二维码的内容width: 100,height: 100,colorDark: '#000000',colorLight: '#ffffff',correctLevel: QRCode.CorrectLevel.H})},},mounted() {this.creatQrCode();},</script> |
- 样式(这里再提供一个给二维码添加边框的小技巧:如下图所示,我们生成的二维码是没有边框的,看起来不是很好看)

.qrcode{display: inline-block;img {width: 132px;height: 132px;background-color: #fff; //设置白色背景色padding: 6px; // 利用padding的特性,挤出白边box-sizing: border-box;}} |
就有了下面的效果:

方式二:vue-qr
- npm
| 1 | npm install vue-qr --save |
- import
| 1 | import vueQr from 'vue-qr' |
- 使用
// logoSrc为logo的url地址(使用require的方式);text为需要转换为二维码的内容<vue-qr :logoSrc="imageUrl" text="xxx" :size="200"></vue-qr> <script>export default {name: "qecode",data() {return {imageUrl: require("../assets/logo.png"),}},components: {vueQr},},}</script> |
Web端轻松实现音视频聊天通话
网络上视频主播的火热带动了网络视频聊天室开发行业的火热。现在网上企业或者工作室在弄网页的视频聊天室。通过个人学习,借用别人的开发Demo(AnyChat SDK,网上随便搜索一下就可以下载的),加上几十行JavaScript脚本就能轻松实现视频通话;也不用去下载指定的什么浏览器,因为IE、firefox、chrome等windows平台主流浏览器全部通过,完美运行。下边就跟大伙分享分享我的成果,布局代码就不贴出来了,只贴JavaScript脚本。下面是我所使用的开发包的特点:1. 支持Windows平台浏览器上的音频即时通讯应用开发2. 提供JavaScript语言API接口,脚本编程3. 兼容IE、Chrome、Firefox、360、遨游等主流浏览器4. 支持iOS、Android、PC等设备和Web之间的互联互通一、加载AnyChat for Web SDK库首先还是得先加载AnyChatfor Web SDK库<scriptlanguage=”javascript” type=”text/javascript”src=”./javascript/anychatsdk.js”charset=”GB2312″></script><scriptlanguage=”javascript” type=”text/javascript”src=”./javascript/anychatevent.js”charset=”GB2312″></script>二、全局变量定义定义全局变量var mDefaultServerAddr =”demo.anychat.cn”; // 默认服务器地址var mDefaultServerPort = 8906; // 默认服务器端口号var mSelfUserId = -1; // 本地用户IDvar mTargetUserId = -1; // 目标用户ID(请求了对方的音视频)三、调用初始化函数网页加载完成后判断有没有安装插件和插件是否是最新// 页面加载完成 初始化function LogicInit(){ // 初始化 varNEED_ANYCHAT_APILEVEL = “0”; varerrorcode = BRAC_InitSDK(NEED_ANYCHAT_APILEVEL); if(errorcode == GV_ERR_SUCCESS) // 初始化插件成功 document.getElementById(“login_div”).style.display =”block”; // 显示登录界面 else // 没有安装插件,或是插件版本太旧,显示插件下载界面 document.getElementById(“prompt_div”).style.display =”block”; // 显示提示层 }四、调用登录函数在这里服务器地址和端口都写死,输入用户名就可以登录登录按钮点击事件:// 登录系统function LoginToHall() { BRAC_Connect(mDefaultServerAddr, mDefaultServerPort); // 连接服务器 BRAC_Login(document.getElementById(“username”).value, “”,0); // 登录系统,密码为空也可登录 }调用登录函数后首先会触发连接服务器函数// 客户端连接服务器,bSuccess表示是否连接成功,errorcode表示出错代码functionOnAnyChatConnect(bSuccess, errorcode) { if(errorcode == 0) { } // 连接服务器成功 elsealert(“连接服务器失败”); //连接失败作提示,此时系统不会触发登录系统函数}连接服务器成功后会触发登录系统回调函数// 客户端登录系统,dwUserId表示自己的用户ID号,errorcode表示登录结果:0 成功,否则为出错代码,参考出错代码定义functionOnAnyChatLoginSystem(dwUserId, errorcode) { if(errorcode == 0) { // 登录成功,显示大厅界面,隐藏登录界面。失败的话什么也不做,维持原状 mSelfUserId = dwUserId; document.getElementById(“login_div”).style.display =”none”; //隐藏登录界面 document.getElementById(“hall_div”).style.display =”block”; //显示大厅界面 }}五、调用进入房间函数登录成功后显示大厅,大厅里就个输入框和一个 进入房间 按钮点击 进入房间 按钮 调用函数// 进入房间functionEnterRoom(){ // 进入自定义房间 BRAC_EnterRoom(parseInt(document.getElementById(“customroomid”).value),””, 0); //进入房间 }进入房间触发回调函数// 客户端进入房间,dwRoomId表示所进入房间的ID号,errorcode表示是否进入房间:0成功进入,否则为出错代码functionOnAnyChatEnterRoom(dwRoomId, errorcode) { if(errorcode == 0) { // 进入房间成功,显示房间界面,隐藏大厅界面;进入房间失败时不作任何动作 document.getElementById(“hall_div”).style.display = “none”;//隐藏大厅界面 document.getElementById(“room_div”).style.display =”block”; //显示房间界面 BRAC_UserCameraControl(mSelfUserId, 1); // 打开本地视频 BRAC_UserSpeakControl(mSelfUserId, 1); // 打开本地语音 // 设置本地视频显示位置 BRAC_SetVideoPos(mSelfUserId,document.getElementById(“AnyChatLocalVideoDiv”),”ANYCHAT_VIDEO_LOCAL”); // 设置远程视频显示位置(没有关联到用户,只是占位置) BRAC_SetVideoPos(0, document.getElementById(“AnyChatRemoteVideoDiv”),”ANYCHAT_VIDEO_REMOTE”); }}
进入房间时,会触发在线用户回调函数// 收到当前房间的在线用户信息,进入房间后触发一次,dwUserCount表示在线用户数(包含自己),dwRoomId表示房间IDfunctionOnAnyChatRoomOnlineUser(dwUserCount, dwRoomId) { // 判断是否需要关闭之前已请求的用户音视频数据 if(mTargetUserId != -1) { // mTargetUserId 表示 上次视频会话的用户ID 为自定义变量 BRAC_UserCameraControl(mTargetUserId, 0); // 关闭远程视频 BRAC_UserSpeakControl(mTargetUserId, 0); // 关闭远程语音 mTargetUserId = -1; } if(dwUserCount > 1) // 在该函数中判断是否有在线用户,有的话就打开其中一个远程视频 SetTheVideo();}有用户退出房间时判断是否远程用户,并作出相应操作// 用户进入(离开)房间,dwUserId表示用户ID号,bEnterRoom表示该用户是进入(1)或离开(0)房间functionOnAnyChatUserAtRoom(dwUserId, bEnterRoom) { if(bEnterRoom == 1) if (mTargetUserId == -1) SetTheVideo(); else { if (mTargetUserId == dwUserId) mTargetUserId = -1; }}发送信息时调用函数// 发送信息function SendMessage() { BRAC_SendTextMessage(0, 0,document.getElementById(“SendMsg”).innerHTML); //调用发送信息函数 Msg:信息内容 document.getElementById(“ReceiveMsg”).innerHTML += “我:” + document.getElementById(“SendMsg”).innerHTML +”<br />”; document.getElementById(“SendMsg”).innerHTML = “”;}收到在线用户发来信息时会触发函数// 收到文字消息functionOnAnyChatTextMessage(dwFromUserId, dwToUserId, bSecret, lpMsgBuf, dwLen) { document.getElementById(“ReceiveMsg”).innerHTML +=BRAC_GetUserName(dwFromUserId) + “:” + lpMsgBuf +”<br />”; // 收到信息显示到接收框}自定义函数//自定义函数 请求远程视频用户function SetTheVideo() { varuseridlist = BRAC_GetOnlineUser(); // 获取所有在线用户ID BRAC_UserCameraControl(useridlist[0], 1); // 请求对方视频 BRAC_UserSpeakControl(useridlist[0], 1); // 请求对方语音 BRAC_SetVideoPos(useridlist[0],document.getElementById(“AnyChatRemoteVideoDiv”),”ANYCHAT_VIDEO_REMOTE”); // 设置远程视频显示位置 mTargetUserId = useridlist[0];}六、退出房间退出房间调用函数functionOutOfRoom(){ BRAC_LeaveRoom(dwRoomid);}七、退出系统退出系统调用函数functionOutOfSystem(){ BRAC_Logout();}
到此,简单的视频聊天室就完成了,如果你是个人的研究,不讲究界面和风格,甚至可以直接试用,可以和朋友直接视频聊天了,如果你是开发工作室,那么请一个设计师,优化界面和其他功能部署,那么你的开发基本完成了!
原文链接:http://www.itpub.net/thread-1898060-1-7.html
Vue中使用js-pinyin包实现城市按首字母排序
最近做项目中,碰到了点小麻烦:
后台从接口请求回来的城市相关的数据只有城市名称,没有排序,铺页面的时候要排序就很麻烦;
面向百度编程时候找到了一个包,用它来将字符串转成拼音,就可以通过字符串截取取出拼音首字母,这样就可以进行首字母排序了。
这个包的名字叫js-pinyin。
- npm下载
npm i js-pinyin
- 下载完了之后在main.js中引入
import pinyin from ‘js-pinyin’
这样使用环境就配置好了。
当在组件中使用时,要先在export default前引用node_modules/js-pinyin中的index.js文件:
import pinyin from ‘../../../node_modules/js-pinyin/index’
注意node_modules/js-pinyin的文件路径
因为我要在页面加载时就使用这个需要排序的数据,所以我将代码写入mounted()中。
在使用真实数据前,我们先写一个小demo:
在组件中使用时,要添加
let pinyin = require(‘js-pinyin’);
和
pinyin.setOptions({checkPolyphone: false, charCase: 0});
两行代码,一个是引入js-pinyin,一个是配置js-pinyin。
完整的demo就是这样:
mounted() {
    let pinyin = require('js-pinyin');
    pinyin.setOptions({checkPolyphone: false, charCase: 0});
    console.log(pinyin.getFullChars('管理员'));    //GuanLiYuan
    console.log(pinyin.getCamelChars('管理员'));    //GLY
    console.log(pinyin.getCamelChars('1234'));    //1234
    console.log(pinyin.getCamelChars('english'));    //english
}
上述2个console.log中使用的函数,是js-pinyin中设计好的2个函数,作用分别是:
- getFullChars():获取字符串全部拼音,并且首字母大写;
- getCamelChars() : 获取字符串拼音首字母,并大写;
getCamelChars()中传入的参数不是汉字时,不会进行转换,仍然输出源字符串。
接下来使用真实数据:
首先后台给我请求回来的数据结构是这个样子的:
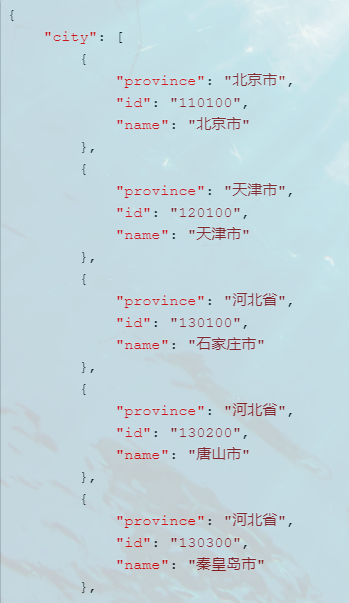
我需要使用js-pinyin给请求回来的数据添加一个“first: 首字母”键值对,用来标识首字母。
data() {
return {
FristPin: ["A", "B", "C", "D", "E", "F", "G", "H", "J", "K", "L", "M", "N", "P", "Q", "R", "S", "T", "W", "X", "Y", "Z"],
cityjson: {},
}
},
mounted() {
let pinyin = require('js-pinyin');
pinyin.setOptions({checkPolyphone: false, charCase: 0});
//先拿到全部城市的名字
let cityArr = [];
index.tools.getAllCity().then(res => { //这是axios请求,请求回来的结果是res
for (let i = 0; i < res.data.city.length; i++) {
//遍历数组,拿到城市名称
let cityName = res.data.city[i].name;
//取全部城市的首字母
let fristName = pinyin.getCamelChars(cityName).substring(0, 1); //这里截取首字母的第一位
//给原json添加首字母键值对
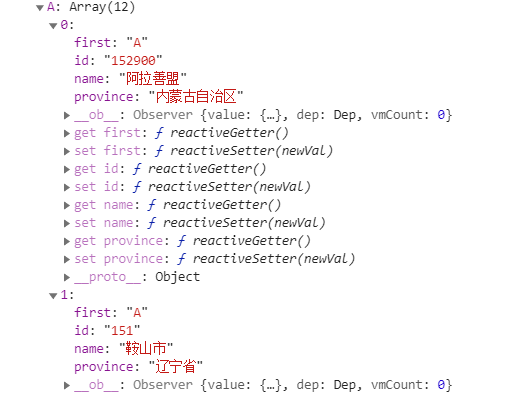
res.data.city[i].first = fristName;
//放入新数组
cityArr.push(res.data.city[i]);
}
let cityJson = {};
//根据首字母键值对给原数据按首字母分类
for (let i = 0; i < _this.FristPin.length; i++) { //这里的FirstPin是一个写入了所有字母的数组,见data中
cityJson[_this.FristPin[i]] = cityArr.filter(function (value) {
return value.first === _this.FristPin[i];
})
}
_this.cityjson = cityJson;
}
});
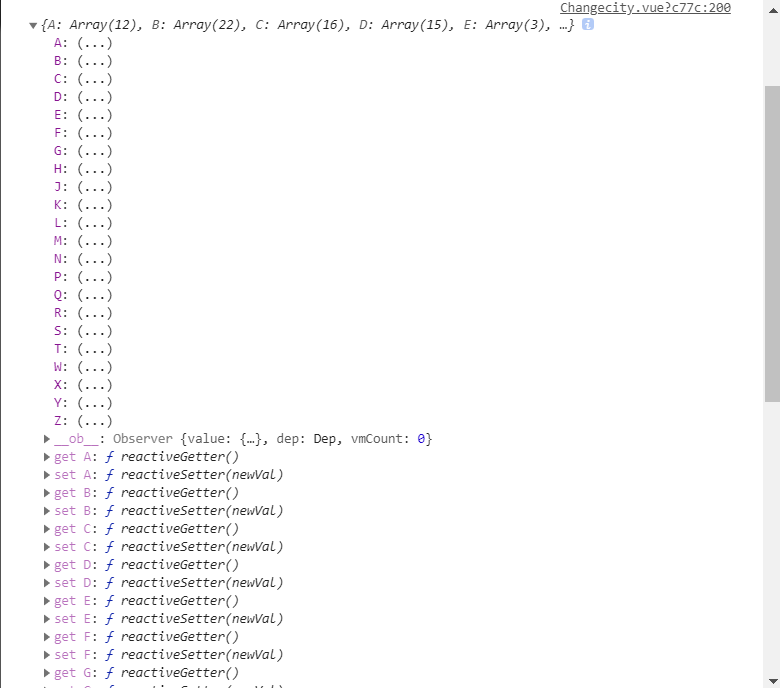
最后请求回来的数据经过我们处理后变成了data中的this.cityjson,就是以首字母开头的结构了。

vue 扫描二维码,获取二维码上的信息
扫描二维码和相册识别二维码 html5plus
<template>
    <div id="bcid">
    </div>
</template>

<script lang="ts">
    import {$, Component, getAjax, postAjax, putAjax, url, Vue, Watch,MessageBox} from '../../untis/common';

    @Component({
        components: {},
    })
    export default class login extends Vue {
        mounted(){
            this.startRecognize();
        }
        // 创建扫描控件
        startRecognize() {
            console.log(1);
            //@ts-ignore
            if (!window.plus) return;
            //@ts-ignore
            console.log('window.plus',window.plus);
            //@ts-ignore
            let scan = new plus.barcode.Barcode('bcid');
            console.log('scan',scan);
            scan.onmarked = onmarked;
            function onmarked(type:any, result:any, file:any) {
                switch (type) {
                    //@ts-ignore
                    case plus.barcode.QR:
                        type = 'QR'
                        break
                    //@ts-ignore
                    case plus.barcode.EAN13:
                        type = 'EAN13'
                        break
                    //@ts-ignore
                    case plus.barcode.EAN8:
                        type = 'EAN8'
                        break
                    default:
                        type = '其它' + type
                        break
                }
                // 获得code
                result = result.replace(/\n/g, '')
                console.log('result',result);
            }
            scan.start()
        }

    }
</script>

<style lang="less">
    @import "../../assets/less/common.less";
    #app{
        height:100%;
    }
    #bcid {
        width: 100%;
        position: absolute;
        left: 0;
        right: 0;
        top: 0;
        bottom:3rem;
        text-align: center;
        color: #fff;
        background: #ccc;
    }
</style>
vue实现录音功能及播放amr文件(pc端)
录音功能一般来说在移动端比较常见,但是在pc端也要实现按住说话的功能呢?项目需求:按住说话,时长不超过60秒,生成语音文件并上传,我这里用的是recorder.js
1.项目中新建一个recorder.js文件,内容如下,也可在百度上直接搜一个
// 兼容window.URL = window.URL || window.webkitURLnavigator.getUserMedia = navigator.getUserMedia || navigator.webkitGetUserMedia || navigator.mozGetUserMedia || navigator.msGetUserMedialet HZRecorder = function (stream, config) { config = config || {} config.sampleBits = config.sampleBits || 8 // 采样数位 8, 16 config.sampleRate = config.sampleRate || (44100 / 6) // 采样率(1/6 44100) let context = new (window.webkitAudioContext || window.AudioContext)() let audioInput = context.createMediaStreamSource(stream) let createScript = context.createScriptProcessor || context.createJavaScriptNode let recorder = createScript.apply(context, [4096, 1, 1]) let audioData = { size: 0, // 录音文件长度 buffer: [], // 录音缓存 inputSampleRate: context.sampleRate, // 输入采样率 inputSampleBits: 16, // 输入采样数位 8, 16 outputSampleRate: config.sampleRate, // 输出采样率 oututSampleBits: config.sampleBits, // 输出采样数位 8, 16 input: function (data) { this.buffer.push(new Float32Array(data)) this.size += data.length }, compress: function () { // 合并压缩 // 合并 let data = new Float32Array(this.size) let offset = 0 for (let i = 0; i < this.buffer.length; i++) { data.set(this.buffer[i], offset) offset += this.buffer[i].length } // 压缩 let compression = parseInt(this.inputSampleRate / this.outputSampleRate) let length = data.length / compression let result = new Float32Array(length) let index = 0; let j = 0 while (index < length) { result[index] = data[j] j += compression index++ } return result }, encodeWAV: function () { let sampleRate = Math.min(this.inputSampleRate, this.outputSampleRate) let sampleBits = Math.min(this.inputSampleBits, this.oututSampleBits) let bytes = this.compress() let dataLength = bytes.length * (sampleBits / 8) let buffer = new ArrayBuffer(44 + dataLength) let data = new DataView(buffer) let channelCount = 1// 单声道 let offset = 0 let writeString = function (str) { for (let i = 0; i < str.length; i++) { data.setUint8(offset + i, str.charCodeAt(i)) } } // 资源交换文件标识符 writeString('RIFF'); offset += 4 // 下个地址开始到文件尾总字节数,即文件大小-8 data.setUint32(offset, 36 + dataLength, true); offset += 4 // WAV文件标志 writeString('WAVE'); offset += 4 // 波形格式标志 writeString('fmt '); offset += 4 // 过滤字节,一般为 0x10 = 16 data.setUint32(offset, 16, true); offset += 4 // 格式类别 (PCM形式采样数据) data.setUint16(offset, 1, true); offset += 2 // 通道数 data.setUint16(offset, channelCount, true); offset += 2 // 采样率,每秒样本数,表示每个通道的播放速度 data.setUint32(offset, sampleRate, true); offset += 4 // 波形数据传输率 (每秒平均字节数) 单声道×每秒数据位数×每样本数据位/8 data.setUint32(offset, channelCount * sampleRate * (sampleBits / 8), true); offset += 4 // 快数据调整数 采样一次占用字节数 单声道×每样本的数据位数/8 data.setUint16(offset, channelCount * (sampleBits / 8), true); offset += 2 // 每样本数据位数 data.setUint16(offset, sampleBits, true); offset += 2 // 数据标识符 writeString('data'); offset += 4 // 采样数据总数,即数据总大小-44 data.setUint32(offset, dataLength, true); offset += 4 // 写入采样数据 if (sampleBits === 8) { for (let i = 0; i < bytes.length; i++ , offset++) { let s = Math.max(-1, Math.min(1, bytes[i])) let val = s < 0 ? s * 0x8000 : s * 0x7FFF val = parseInt(255 / (65535 / (val + 32768))) data.setInt8(offset, val, true) } } else { for (let i = 0; i < bytes.length; i++ , offset += 2) { let s = Math.max(-1, Math.min(1, bytes[i])) data.setInt16(offset, s < 0 ? s * 0x8000 : s * 0x7FFF, true) } } return new Blob([data], { type: 'audio/mp3' }) } } // 开始录音 this.start = function () { audioInput.connect(recorder) recorder.connect(context.destination) } // 停止 this.stop = function () { recorder.disconnect() } // 获取音频文件 this.getBlob = function () { this.stop() return audioData.encodeWAV() } // 回放 this.play = function (audio) { let downRec = document.getElementById('downloadRec') downRec.href = window.URL.createObjectURL(this.getBlob()) downRec.download = new Date().toLocaleString() + '.mp3' audio.src = window.URL.createObjectURL(this.getBlob()) } // 上传 this.upload = function (url, callback) { let fd = new FormData() fd.append('audioData', this.getBlob()) let xhr = new XMLHttpRequest() /* eslint-disable */ if (callback) { xhr.upload.addEventListener('progress', function (e) { callback('uploading', e) }, false) xhr.addEventListener('load', function (e) { callback('ok', e) }, false) xhr.addEventListener('error', function (e) { callback('error', e) }, false) xhr.addEventListener('abort', function (e) { callback('cancel', e) }, false) } /* eslint-disable */ xhr.open('POST', url) xhr.send(fd) } // 音频采集 recorder.onaudioprocess = function (e) { audioData.input(e.inputBuffer.getChannelData(0)) // record(e.inputBuffer.getChannelData(0)); }}// 抛出异常HZRecorder.throwError = function (message) { alert(message) throw new function () { this.toString = function () { return message } }()}// 是否支持录音HZRecorder.canRecording = (navigator.getUserMedia != null)// 获取录音机HZRecorder.get = function (callback, config) { if (callback) { if (navigator.getUserMedia) { navigator.getUserMedia( { audio: true } // 只启用音频 , function (stream) { let rec = new HZRecorder(stream, config) callback(rec) } , function (error) { switch (error.code || error.name) { case 'PERMISSION_DENIED': case 'PermissionDeniedError': HZRecorder.throwError('用户拒绝提供信息。') break case 'NOT_SUPPORTED_ERROR': case 'NotSupportedError': HZRecorder.throwError('浏览器不支持硬件设备。') break case 'MANDATORY_UNSATISFIED_ERROR': case 'MandatoryUnsatisfiedError': HZRecorder.throwError('无法发现指定的硬件设备。') break default: HZRecorder.throwError('无法打开麦克风。异常信息:' + (error.code || error.name)) break } }) } else { HZRecorder.throwErr('当前浏览器不支持录音功能。'); return } }}export default HZRecorder复制代码2.页面中使用,具体如下
<template> <div class="wrap"> <el-form v-model="form"> <el-form-item> <input type="button" class="btn-record-voice" @mousedown.prevent="mouseStart" @mouseup.prevent="mouseEnd" v-model="form.time"/> <audio v-if="form.audioUrl" :src="form.audioUrl" controls="controls" class="content-audio" style="display: block;">语音</audio> </el-form-item> <el-form> </div></template><script>// 引入recorder.jsimport recording from '@/js/recorder/recorder.js'export default { data() { return { form: { time: '按住说话(60秒)', audioUrl: '' }, num: 60, // 按住说话时间 recorder: null, interval: '', audioFileList: [], // 上传语音列表 startTime: '', // 语音开始时间 endTime: '', // 语音结束 } }, methods: { // 清除定时器 clearTimer () { if (this.interval) { this.num = 60 clearInterval(this.interval) } }, // 长按说话 mouseStart () { this.clearTimer() this.startTime = new Date().getTime() recording.get((rec) => { // 当首次按下时,要获取浏览器的麦克风权限,所以这时要做一个判断处理 if (rec) { // 首次按下,只调用一次 if (this.flag) { this.mouseEnd() this.flag = false } else { this.recorder = rec this.interval = setInterval(() => { if (this.num <= 0) { this.recorder.stop() this.num = 60 this.clearTimer() } else { this.num-- this.time = '松开结束(' + this.num + '秒)' this.recorder.start() } }, 1000) } } }) }, // 松开时上传语音 mouseEnd () { this.clearTimer() this.endTime = new Date().getTime() if (this.recorder) { this.recorder.stop() // 重置说话时间 this.num = 60 this.time = '按住说话(' + this.num + '秒)' // 获取语音二进制文件 let bold = this.recorder.getBlob() // 将获取的二进制对象转为二进制文件流 let files = new File([bold], 'test.mp3', {type: 'audio/mp3', lastModified: Date.now()}) let fd = new FormData() fd.append('file', files) fd.append('tenantId', 3) // 额外参数,可根据选择填写 // 这里是通过上传语音文件的接口,获取接口返回的路径作为语音路径 this.uploadFile(fd) } } }}</script><style scoped></style>复制代码3.除了上述代码中的注释外,还有一些地方需要注意
- 上传语音时,一般会有两个参数,一个是语音的路径,一个是语音的时长,路径直接就是
this.form.audioUrl,不过时长这里需要注意的是,由于我们一开始设置了定时器是有一秒的延迟,所以,要在获取到的时长基础上在减去一秒 - 初次按住说话一定要做判断,不然就会报错啦
- 第三点也是很重要的一点,因为我是在本地项目中测试的,可以实现录音功能,但是打包到测试环境后,就无法访问麦克风,经过多方尝试后,发现是由于我们测试环境的地址是http://***,而在谷歌浏览器中有这样一种安全策略,只允许在localhost下及https下才可以访问 ,因此换一下就完美的解决了这个问题了
- 在使用过程中,针对不同的浏览器可能会有些兼容性的问题,如果遇到了还需自己单独处理下
上面说过了语音的按住说话功能,接下来说一说语音的播放,播放这里分为两种,一种是返回的mp3格式,通过展示audio播放,另一种是返回amr格式的播放
- 正常播放(mp3、wav)
一般来说,这种格式的播放不需要格外的转换,接口一般会返回语音的url以及播放时长,通过audio标签展示即可
- mar格式播放
由于html5标签并不支持播放amr格式的文件,所以需要单独处理,步骤如下
下载 npm install benz-amr-recorder -S
在文件中引入的前提下,进行如下操作
// 播放,playurl为按钮的点击事件,url为获取的amr格式文件 playUrl (url) { let amr = new BenzAMRRecorder() amr.initWithUrl(url).then(function () { amr.play() }) }复制代码如果需要使用amr格式的其他操作,可参考 https://www.npmjs.com/package/benz-amr-recorder
好多东西都是在项目中才学会的,所以要趁着记忆还清晰,赶紧记下来,如果上述有什么不对的地方,还请指正
转载于:https://juejin.im/post/5cf60f6be51d45595319e2fe
【前端】vue+recorder实现录音功能
重要的事情说三遍:要在https下才能实现! 要在https下才能实现!! 要在https下才能实现!!!
我当时就是忽略了这个点折腾了很久,最后根据这篇文章:Vue.js实战——封装浏览器录音组件_6,实现了录音功能。
因为本地是http,不能看到效果,建议使用【whistle】强大的web调试代理工具来进行代理本地,随时查看修改的效果
因为原文章不能抛出录音失败的错误,所以在此基础修改下
//recorder.js
export default class Recorder {
  constructor(stream, config) {
    //兼容
    window.URL = window.URL || window.webkitURL;
    navigator.getUserMedia = navigator.getUserMedia || navigator.webkitGetUserMedia || navigator.mozGetUserMedia || navigator.msGetUserMedia;

    config = config || {};
    config.sampleBits = config.sampleBits || 16;   //采样数位 8, 16
    config.sampleRate = config.sampleRate || 8000; //采样率(1/6 44100)

    this.context = new (window.webkitAudioContext || window.AudioContext)();
    this.audioInput = this.context.createMediaStreamSource(stream);
    this.createScript = this.context.createScriptProcessor || this.context.createJavaScriptNode;
    this.recorder = this.createScript.apply(this.context, [4096, 1, 1]);

    this.audioData = {
      size: 0,          //录音文件长度
      buffer: [],    //录音缓存
      inputSampleRate: this.context.sampleRate,   //输入采样率
      inputSampleBits: 16,     //输入采样数位 8, 16
      outputSampleRate: config.sampleRate,   //输出采样率
      oututSampleBits: config.sampleBits,       //输出采样数位 8, 16
      input: function (data) {
        this.buffer.push(new Float32Array(data));
        this.size += data.length;
      },
      compress: function () { //合并压缩
        //合并
        let data = new Float32Array(this.size);
        let offset = 0;
        for (let i = 0; i < this.buffer.length; i++) {
          data.set(this.buffer[i], offset);
          offset += this.buffer[i].length;
        }
        //压缩
        let compression = parseInt(this.inputSampleRate / this.outputSampleRate);
        let length = data.length / compression;
        let result = new Float32Array(length);
        let index = 0, j = 0;
        while (index < length) {
          result[index] = data[j];
          j += compression;
          index++;
        }
        return result;
      },
      encodeWAV: function () {
        let sampleRate = Math.min(this.inputSampleRate, this.outputSampleRate);
        let sampleBits = Math.min(this.inputSampleBits, this.oututSampleBits);
        let bytes = this.compress();
        let dataLength = bytes.length * (sampleBits / 8);
        let buffer = new ArrayBuffer(44 + dataLength);
        let data = new DataView(buffer);

        let channelCount = 1;//单声道
        let offset = 0;

        let writeString = function (str) {
          for (let i = 0; i < str.length; i++) {
            data.setUint8(offset + i, str.charCodeAt(i));
          }
        };

        // 资源交换文件标识符
        writeString('RIFF');
        offset += 4;
        // 下个地址开始到文件尾总字节数,即文件大小-8
        data.setUint32(offset, 36 + dataLength, true);
        offset += 4;
        // WAV文件标志
        writeString('WAVE');
        offset += 4;
        // 波形格式标志
        writeString('fmt ');
        offset += 4;
        // 过滤字节,一般为 0x10 = 16
        data.setUint32(offset, 16, true);
        offset += 4;
        // 格式类别 (PCM形式采样数据)
        data.setUint16(offset, 1, true);
        offset += 2;
        // 通道数
        data.setUint16(offset, channelCount, true);
        offset += 2;
        // 采样率,每秒样本数,表示每个通道的播放速度
        data.setUint32(offset, sampleRate, true);
        offset += 4;
        // 波形数据传输率 (每秒平均字节数) 单声道×每秒数据位数×每样本数据位/8
        data.setUint32(offset, channelCount * sampleRate * (sampleBits / 8), true);
        offset += 4;
        // 快数据调整数 采样一次占用字节数 单声道×每样本的数据位数/8
        data.setUint16(offset, channelCount * (sampleBits / 8), true);
        offset += 2;
        // 每样本数据位数
        data.setUint16(offset, sampleBits, true);
        offset += 2;
        // 数据标识符
        writeString('data');
        offset += 4;
        // 采样数据总数,即数据总大小-44
        data.setUint32(offset, dataLength, true);
        offset += 4;
        // 写入采样数据
        if (sampleBits === 8) {
          for (let i = 0; i < bytes.length; i++ , offset++) {
            let s = Math.max(-1, Math.min(1, bytes[i]));
            let val = s < 0 ? s * 0x8000 : s * 0x7FFF;
            val = parseInt(255 / (65535 / (val + 32768)));
            data.setInt8(offset, val, true);
          }
        } else {
          for (let i = 0; i < bytes.length; i++ , offset += 2) {
            let s = Math.max(-1, Math.min(1, bytes[i]));
            data.setInt16(offset, s < 0 ? s * 0x8000 : s * 0x7FFF, true);
          }
        }
        return new Blob([data], { type: 'audio/wav' });
      }
    };
  }

  //开始录音
  start () {
    this.audioInput.connect(this.recorder);
    this.recorder.connect(this.context.destination);

    //音频采集
    let self = this;
    this.recorder.onaudioprocess = function (e) {
      self.audioData.input(e.inputBuffer.getChannelData(0));
    };
  };

  //停止
  stop () {
    this.recorder.disconnect();
  };

  //获取音频文件
  getBlob () {
    this.stop();
    return this.audioData.encodeWAV();
  };

  //回放
  play (audio) {
    audio.src = window.URL.createObjectURL(this.getBlob());
  };

  //清理缓存的录音数据
  clear (audio) {
    this.audioData.buffer = [];
    this.audioData.size = 0;
    audio.src = ''
  };

  static checkError (e) {
    const { name } = e;
    let errorMsg = ''
    switch (name) {
      case 'AbortError': errorMsg = '录音设备无法被使用'; break;
      case 'NotAllowedError': errorMsg = '用户已禁止网页调用录音设备'; break;
      case 'PermissionDeniedError': errorMsg = '用户已禁止网页调用录音设备'; break;     // 用户拒绝
      case 'NotFoundError': errorMsg = '录音设备未找到'; break;
      case 'DevicesNotFoundError': errorMsg = '录音设备未找到'; break;
      case 'NotReadableError': errorMsg = '录音设备无法使用'; break;
      case 'NotSupportedError': errorMsg = '不支持录音功能'; break;
      case 'MandatoryUnsatisfiedError': errorMsg = '无法发现指定的硬件设备'; break;
      default: errorMsg = '录音调用错误'; break;
    }
    return { error: errorMsg }
  };

  static get (callback, config) {
    if (callback) {
      if (navigator.mediaDevices && navigator.mediaDevices.getUserMedia) {
        navigator.mediaDevices.getUserMedia({ audio: true, video: false }).then((stream) => {
          let rec = new Recorder(stream, config);
          callback(rec);
        }).catch((e) => {
          callback(Recorder.checkError(e));
        })
      } else {
        navigator.getUserMedia({ audio: true, video: false }).then((stream) => {
          let rec = new Recorder(stream, config);
          callback(rec);
        }).catch((e) => {
          // Recorder.checkError(e)
          callback(Recorder.checkError(e));
        })
      }
    }
  };
}
//record-sdk.js
import Recorder from "./recorder";
export default class Record {
  startRecord (param) {
    let self = this;
    try {
      Recorder.get(rec => {
        if (rec.error) return param.error(rec.error);
        self.recorder = rec;
        self.recorder.start();
        param.success("开始录音");
      })
    } catch (e) {
      param.error("开始录音失败" + e);
    }
  }

  stopRecord (param) {
    let self = this;
    try {
      let blobData = self.recorder.getBlob();
      param.success(blobData);
    } catch (e) {
      param.error("结束录音失败" + e);
    }
  }

  play (audio) {
    let self = this;
    try {
      self.recorder.play(audio);
    } catch (e) {
      console.error("录音播放失败" + e);
    }
  }

  clear (audio) {
    let self = this;
    try {
      self.recorder.clear(audio);
    } catch (e) {
      console.error("清空录音失败" + e);
    }
  }
}
//voice.vue
...
  <div class="record">
      <h1>{{tipMsg}}</h1>
      <button @click="onStartVoice">开始</button>
      <button @click="onEndVoice">结束</button>
      <button @click="onPlayAudio">播放</button>
      <div class="record-play"
           v-show="isFinished">
        <h2>Current voice player is:</h2>
        <audio id="audioVoice"
               controls
               autoplay></audio>
      </div>
    </div>
...
<script>
import Record from '@/plugins/recorder/record-sdk';
export default {
  data () {
    return {
      isVoice: false,
      isFinished: false,
      tipMsg: '录音',
      audio: "",
      recorder: new Record()
    }
  },
 methods: {
     // 开始录音
    onStartVoice () {
      this.onStopAudio()
      this.isFinished = false;
      this.recorder.startRecord({
        success: res => {
          this.isVoice = true
        },
        error: e => {
          this.isVoice = false
          this.$toast(e)
        }
      });
    },

    // 结束录音
    onEndVoice () {
      this.isFinished = false;
      this.recorder.stopRecord({
        success: res => {
          this.isVoice = false
          //此处可以获取音频源文件(res),用于上传等操作
          console.log('音频源文件', res)
        },
        error: e => {
          this.isVoice = false
        }
      });
    },

    // 播放录音
    onPlayAudio () {
      this.isVoice = false
      this.isFinished = true;
      this.audio = document.getElementById("audioVoice");
      this.recorder.play(this.audio);
    },

    // 停止播放录音
    onStopAudio () {
      this.recorder.clear(this.audio);
    }
  }
}
</script>
因为项目可能要实现语音录菜功能,便提前看下h5是否可以录音,如果后期真要实现语音录菜功能,,再来更新
作者:北极星丶超帅的
链接:https://www.jianshu.com/p/f5637e838af0
来源:简书
著作权归作者所有。商业转载请联系作者获得授权,非商业转载请注明出处。
vue 实现 扫二维码 功能
如何通过 vue 调用 相机 实现 扫一扫的功能,但是查看文档发现,需要获取 getUserMedia 的属性值,但存在兼容性问题。
退而求其次,通过 h5plus 来实现。
QrScanner.vue
<!-- 扫描二维码-->
<template>
<div>
<!-- 内容部分 -->
<video id="qr-vedio"class="v"autoplay=""></video>
<canvas id="qr-canvas"width="800"height="600"style="width: 800px; height: 600px;display:none;"></canvas><p v-show="result != ''">{{result}}</p>
<p v-show="errorMes != ''">{{errorMes}}</p></div></template><script>
exportdefault{
props: {//},
data () {
return{
vedio: '',
canvas: '',
context: '',
stopScan: null,
errorMes: '',
result: ''
}
},
mounted(){
console.log(1);
var_that = this;
window.URL = window.URL || window.webkitURL || window.mozURL || window.msURL;
navigator.getUserMedia = navigator.getUserMedia || navigator.webkitGetUserMedia || navigator.mozGetUserMedia || navigator.msGetUserMedia;
this.vedio = document.getElementById('qr-vedio');
this.canvas = document.getElementById('qr-canvas');
this.context = this.canvas.getContext('2d');
console.log(2);// Call the getUserMedia method with our callback functionsif(navigator.getUserMedia) {
console.log(3);
varvideoSource = [];navigator.mediaDevices.enumerateDevices().then((function(sourceInfos) {
var i;
for(i = 0; i != sourceInfos.length; ++i) {
var sourceInfo = sourceInfos[i];
if(sourceInfo.kind === 'videoinput'&& sourceInfo.label.indexOf('back') != -1) {
videoSource.push(sourceInfo.deviceId);
}
}
var successCallback = function(stream) {_
that.vedio.src = (window.URL && window.URL.createObjectURL(stream)) || stream;window.localMediaStream = stream;_that.vedio.addEventListener("loadstart", function() {_that.vedio.play();}, false);
_that.stopScan = setInterval(_that.scan, 500);}
navigator.getUserMedia({
video: {
optional: [{ sourceId: videoSource[0] }]
}}, successCallback, function(e) {console.log(e);});}));
} else{
this.errorMes = 'Native web camera streaming (getUserMedia) not supported in this browser.';
}
qrcode.callback = function(data) {_
that.result = data;
console.log(data)
if(window.localMediaStream && window.localMediaStream.stop) {
window.localMediaStream.stop();
}
if(_that.stopScan) {
clearInterval(_that.stopScan);}};
},methods: {
scan() {
if(window.localMediaStream) {
this.context.drawImage(this.vedio, 0, 0, 100, 100);
}try{
qrcode.decode();
} catch(e) {
console.log('decode has error');
}}}}
</script>
<style lang="less"scoped>
.v {width: 320px;height: 240px;}
#qr-canvas {width: 800px;height: 800px;}
</style>
记录自己写的一个自定义vide标签自定义控制按钮事件播放器,video标签自定义按钮
由于UI还没出样式,于是就先写写video自定义按钮事件,附在线mp4视频测试地址
版本:vue,没样式,只有video标签自定义控制按钮事件
在线mp4测试地址:GO
<template>
    <div class="player">
        <video ref="video" :controls="false" controlslist="nodownload">
            <!-- <source src="./../../assets/source/sintel.mp4" type="video/mp4"/> -->
            <source
                src="http://vfx.mtime.cn/Video/2019/03/21/mp4/190321153853126488.mp4"
                type="video/mp4"
            />
        </video>
        <div class="btns">
            <el-button ref="isPlay" class="stop">停止/播放</el-button>
            <el-button ref="enableMute">关闭声音</el-button>
            <el-button ref="disableMute">打开声音</el-button>
            <input type="range" ref="ran" :value="ranVal"/>
            <div ref="current"></div>
            <!-- 当前进度 -->
            <div ref="buffered"></div>
            <!-- 下载进度 秒 -->
            <div ref="duration"></div>
            <!-- 总时长 -->
            <el-button ref="fullScreen">全屏</el-button>
            <!-- 全屏按钮 -->
            <div ref="progress" style="height:10px;background:#f00;">
                <!-- 进度条 -->
                <div ref="bar" style="height:5px;background:#0f0;"></div>
                <!-- 播放进度 -->
                <div ref="buffer" style="height:5px;background:#00f;"></div>
                <!-- 缓存进度 -->
            </div>
        </div>
    </div>
</template>

<script>
import { hasClass } from "@/commons/func";
export default {
    data() {
        return {
            bufferTimer: null,
            timer: null,
            video: null,

            enableMute: null,
            disableMute: null,
            ran: null,
            ranVal:0,
            current: null,
            buffered: null,
            duration: null,
            fullScreen: null,
            progress: null,
            bar: null,
            buffer: null
        };
    },
    methods: {
        init() {
            this.video = this.$refs.video; //获取video对象
            this.isPlay = this.$refs.isPlay.$el; //获取播放/暂停按钮对象,element-ui库需要'.$el'获取
            this.enableMute = this.$refs.enableMute.$el; //获取关闭声音按钮对象
            this.disableMute = this.$refs.disableMute.$el; //获取开启声音按钮对象
            this.ran = this.$refs.ran; //获取滑块对象,方便调整音量大小
            this.ranVal = this.video.volume*100;
            this.ran.style.backgroundSize = this.ranVal+'% 100%';
            this.current = this.$refs.current; //获取显示当前播放时间进度的对象
            this.buffered = this.$refs.buffered; //获取显示下载进度的对象,下载使用,暂时无用
            this.duration = this.$refs.duration; //
            this.fullScreen = this.$refs.fullScreen.$el;
            this.progress = this.$refs.progress;
            this.bar = this.$refs.bar;
            this.buffer = this.$refs.buffer;
            this.addEvent(this.isPlay, "click", this.playPause);
            this.addEvent(this.video, "timeupdate", this.timeupdate);
            this.addEvent(this.progress, "click", this.changeProgress);
            this.addEvent(this.fullScreen, "click", this.launchFullScreen);
            this.addEvent(this.enableMute, "click", this.closeVolume);
            this.addEvent(this.disableMute, "click", this.openVolume);
            this.rangeSlider(this.ran,{min:0,max:100,step:5,callback:this.setVolume})
        },
        // 补零
        zeroFill(num) {
            if (num < 10) {
                num = "0" + num;
            }
            return num;
        },
        // 处理秒数为时分秒 h:m:s
        getTime(num) {
            let m = this.zeroFill(Math.floor(num / 60) % 60),
                s = this.zeroFill(Math.floor(num % 60)),
                h = this.zeroFill(Math.floor(Math.floor(num / 60) / 60)),
                time = "" + h + ":" + m + ":" + s + "";
            return time;
        },
        //全屏方法
        launchFullScreen() {
            if (this.video.requestFullscreen) {
                this.video.requestFullscreen();
            } else if (this.video.mozRequestFullScreen) {
                this.video.mozRequestFullScreen();
            } else if (this.video.webkitRequestFullscreen) {
                this.video.webkitRequestFullscreen();
            } else if (this.video.msRequestFullscreen) {
                this.video.msRequestFullscreen();
            }
        },
        //播放和暂停
        playPause() {
            let classStr = this.isPlay.className;
            if (hasClass(this.isPlay, "stop")) {
                this.video.play();
                this.bufferTimer = setInterval(() => {
                    this.buffer.style.width =
                        (this.video.buffered.end(0) / this.video.duration) *
                            100 +
                        "%";
                }, 1000 / 30);
                if (this.video.buffered.end(0) == this.video.duration) {
                    this.buffer.style.width = "100%";
                    clearInterval(this.bufferTimer);
                }
                this.timer = setInterval(() => {
                    this.bar.style.width =
                        (this.video.currentTime / this.video.duration) * 100 +
                        "%";
                }, 1000 / 30);
                this.isPlay.className = classStr.replace("stop", "play");
            } else if (hasClass(this.isPlay, "play")) {
                this.video.pause();
                clearInterval(this.timer);
                this.isPlay.className = classStr.replace("play", "stop");
            }
        },
        //视频播放进度改变触发
        timeupdate() {
            this.current.innerHTML = this.getTime(this.video.currentTime);
            this.duration.innerHTML = this.getTime(this.video.duration);
            this.buffered.innerHTML = this.video.buffered.end(0);
            if (this.video.currentTime == this.video.duration) {
                this.isPlay.className = this.isPlay.className.replace(
                    "play",
                    "stop"
                );
            }
        },
        //点击进度条改变播放进度
        changeProgress(e) {
            let barLength = e.pageX - this.progress.offsetLeft;
            this.video.currentTime =
                (barLength / this.progress.clientWidth) * this.video.duration;
            this.bar.style.width =
                (barLength / this.progress.clientWidth) * 100 + "%";
        },
        //关闭声音
        closeVolume() {
            this.video.muted = true;
        },
        //开启声音
        openVolume() {
            this.video.muted = false;
        },
        //设置音量
        setVolume() {
            this.video.volume = this.ran.value / 100;
            this.video.muted = false;
        },
        rangeSlider(rangeElem, { min, max, step, callback }) {
            min = !isNaN(parseFloat(min)) ? Number(min) : null;
            max = !isNaN(parseFloat(max)) ? Number(max) : null;
            step = !isNaN(parseFloat(step)) ? Number(step) : 1;
            callback = callback ? callback : null;

            rangeElem.setAttribute("min", min);
            rangeElem.setAttribute("max", max);
            rangeElem.setAttribute("step", step);

            rangeElem.addEventListener("input", function(e) {
                var that = e.target;
                that.style.backgroundSize = this.value + "% 100%";
                if (typeof callback == "function") {
                    callback(that);
                }
            });
        }
    },
    mounted() {
        this.init();
    }
};
</script>

<style lang="less" scoped>
input[type="range"] {
    -webkit-appearance: none;
    width: 200px;
    height: 5px;
    border-radius: 5px;
    background: -webkit-linear-gradient(#fa03e4, #a5f601) no-repeat;
    background-size: 0% 100%;
}
input[type="range"]::-webkit-slider-thumb {
    -webkit-appearance: none;
    height: 15px;
    width: 5px;
    margin-top: -5px; /*使滑块超出轨道部分的偏移量相等*/
    background: #f5f5f5;
    border-radius: 2px; /*外观设置为圆形*/
    border: solid 1px #a5a5a5; /*设置边框*/
    box-shadow: 0 0px 1px #666666; /*添加底部阴影*/
}
input[type="range"]::-webkit-slider-runnable-track {
    height: 5px;
    border-radius: 2px; /*将轨道设为圆角的*/
    box-shadow: 0 0px 1px #0f00ff, inset 0 0px 2px #00ffff; /* 轨道内置阴影效果 */
}
input[type="range"]:focus {
    outline: none;
}
</style>
有个通用函数是写在外面引入的,现写在这儿,防止用到的兄dei不知道怎么弄
hasClass(elem,classm){
    return elem.className.indexOf(classm) > -1;
}
有几个绑定事件的函数估计会找不到,this.addEvent 找不到的【看这里】,已经封装好了的,可以直接拿去用
获取用户当前位置信息的两种方法——H5、微信
在之前的 调用百度地图API的总结 中获取当前位置信息我用的是 H5 ,其实微信也提供了获取用户地理位置的方法,现将这两种方法都贴出来,看情况选择使用。
一、H5 获取当前地理位置得到经纬度

   // H5 获取当前位置经纬度
    var location_lon = '',location_lat = ''; // 经度,纬度
    if (navigator.geolocation){
        navigator.geolocation.getCurrentPosition(function (position) {
            location_lon = position.coords.longitude;
            location_lat = position.coords.latitude;
           // alert('h5经度:'+location_lon);alert('h5纬度:'+location_lat);
        });
    }else {
        alert("您的设备不支持定位功能");
    }
二、微信公众平台(地理位置)
微信有获取用户地理位置的接口,在 wx.config 中配置就可以用了:
wx.config({
    debug: true,
    appId: '', // 必填,公众号的唯一标识
    timestamp: , // 必填,生成签名的时间戳
    nonceStr: '', // 必填,生成签名的随机串
    signature: '',// 必填,签名
    jsApiList: ['getLocation'] // 必填,需要使用的JS接口列表
});
获得权限后就可以直接使用 wx.getLocation() 方法获得用户的地理位置了:
wx.getLocation({
   type: 'wgs84', // 默认为wgs84的gps坐标,如果要返回直接给openLocation用的火星坐标,可传入'gcj02'
   success: function (res) {
      var latitude = res.latitude; // 纬度,浮点数,范围为90 ~ -90
      var longitude = res.longitude; // 经度,浮点数,范围为180 ~ -180。
      var speed = res.speed; // 速度,以米/每秒计
      var accuracy = res.accuracy; // 位置精度
   }
});
三、地理位置配合地图展示
获得的经纬度可以使用百度地图或者高德地图展示,微信内置地图也可以查看位置:
wx.openLocation({
   latitude: 0, // 纬度,浮点数,范围为90 ~ -90
   longitude: 0, // 经度,浮点数,范围为180 ~ -180。
   name: '', // 位置名
   address: '', // 地址详情说明
   scale: 1, // 地图缩放级别,整形值,范围从1~28。默认为最大
   infoUrl: '' // 在查看位置界面底部显示的超链接,可点击跳转
});